Quick Start
Setting a Log Directory
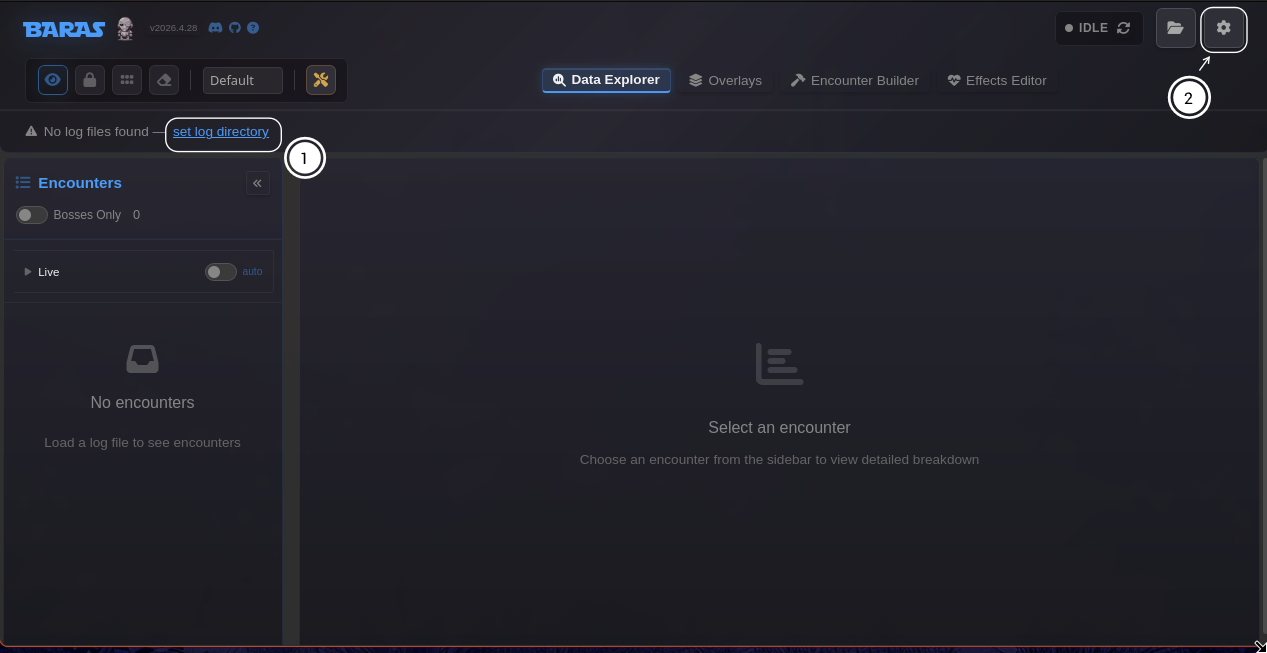
Section titled “Setting a Log Directory”Upon first launching BARAS, you must set the combat log directory.
- Ensure combat logging is enabled in SWTOR:
- In-game: Preferences > Combat Logging > Enable Combat Logging
- The default location is:
- Windows:
Documents\Star Wars - The Old Republic\CombatLogs - Linux (Steam):
~/.steam/steam/steamapps/compatdata/1286830/pfx/drive_c/users/steamuser/Documents/Star Wars - The Old Republic'/CombatLogs - macOS:
todo
- Windows:
You can set the log directory in the applications settings window. This can be accessed by:
- Clicking the blue hyperlinked
set log directorytext - OR cliking the ⚙ icon in the top-right to open the application settings menu
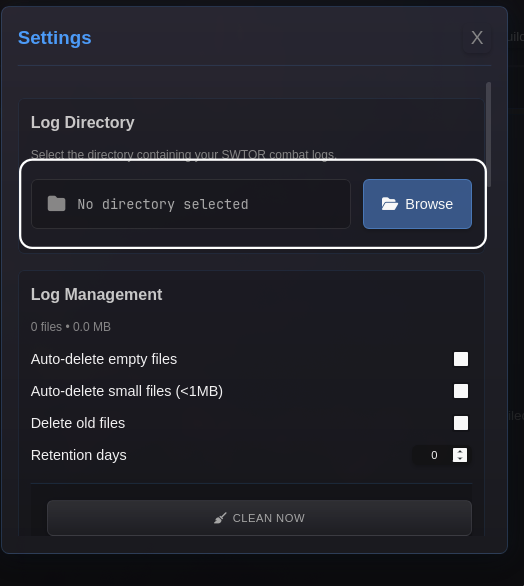
From this menu, you can set the location of the SWTOR combat logs
Once your log directory is set, the application will automatically parse the latest log file in the directory. You will see a green visual indicator that the app is “live” in the top-right corner of the header bar.
The application will always detect the newest log file in the directory and parse it without need for user interaaction.
Application Navigation
Section titled “Application Navigation”
- Overlay controls. Toggle visibility, lock/unlock the overlays, rearrange raid frames, and clear raid frames.
- Overlay profile. Shows active profile. Click this element to switch between profiles.
- Overlay customization menu. Opens a menu that manages overlay profiles and cutomizationo options.
- Navigation pills. Navigates between the major pages of the app.
- Log file menu. Open a window for selecting prior log files.
- Application settings. Opens a menu for global application settings.
- Current session info. Shows information about the active characte.
- Parsely upload button
- Operation timer control.
- Alacrity/latency input.
- Raid notes selection.
- Overlay auto-hide controls.
- Changelog and links to resources.
Enabling Overlays
Section titled “Enabling Overlays”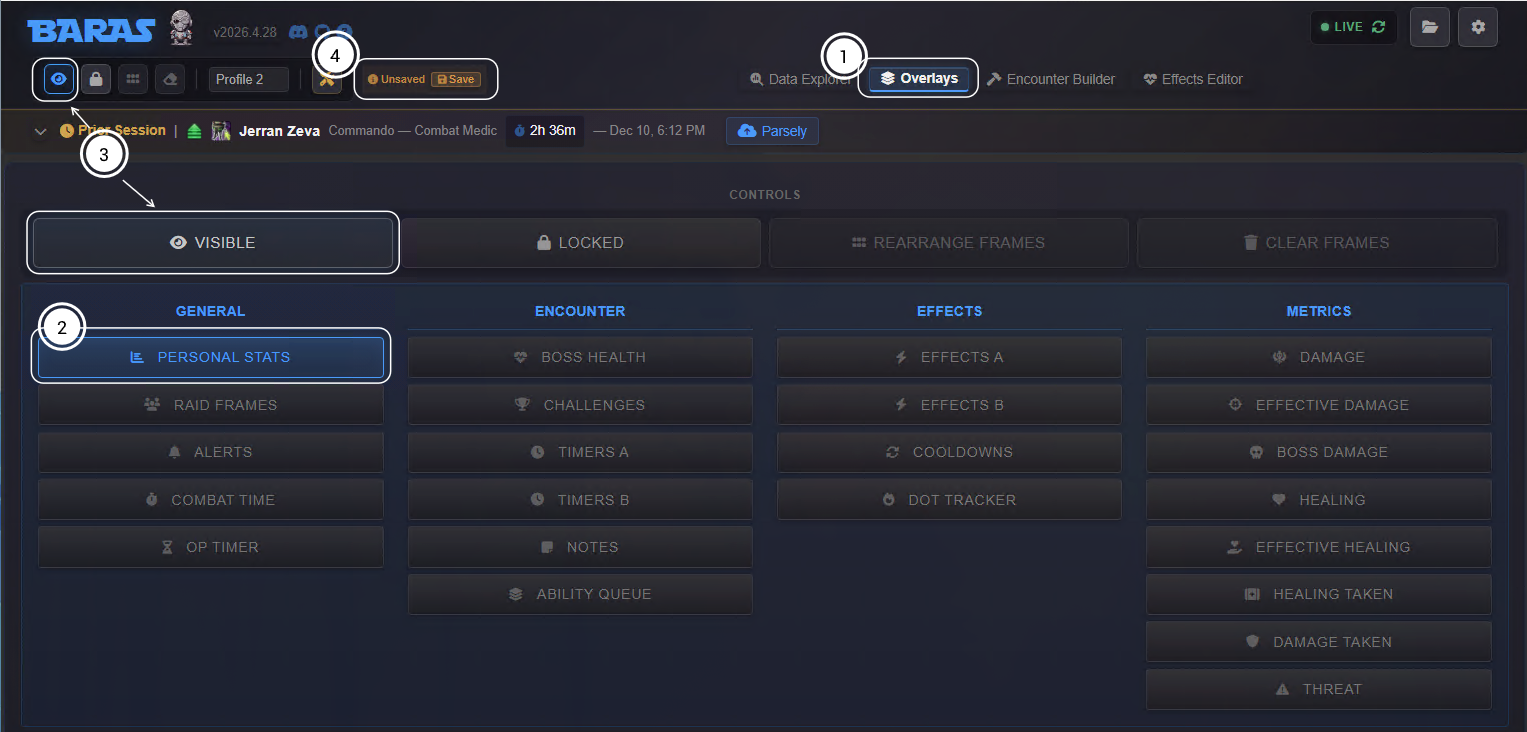
- Navigate to the Overlays control page via the navigation pill in the application header.
- Click on the toggle button for a specific overlay to enable it. By default, overlays will appear in the top-left corner of the active monitor.
- Global overlay visibility can be toggled either via the 👁 button in the header bar or the Hidden/Visible button on the overlay control page.
- A prompt will appear in the application header prompting to save your changes to the current overlay profile. Changes must be saved in order to persist on application restart.
Adjusting Overlays
Section titled “Adjusting Overlays”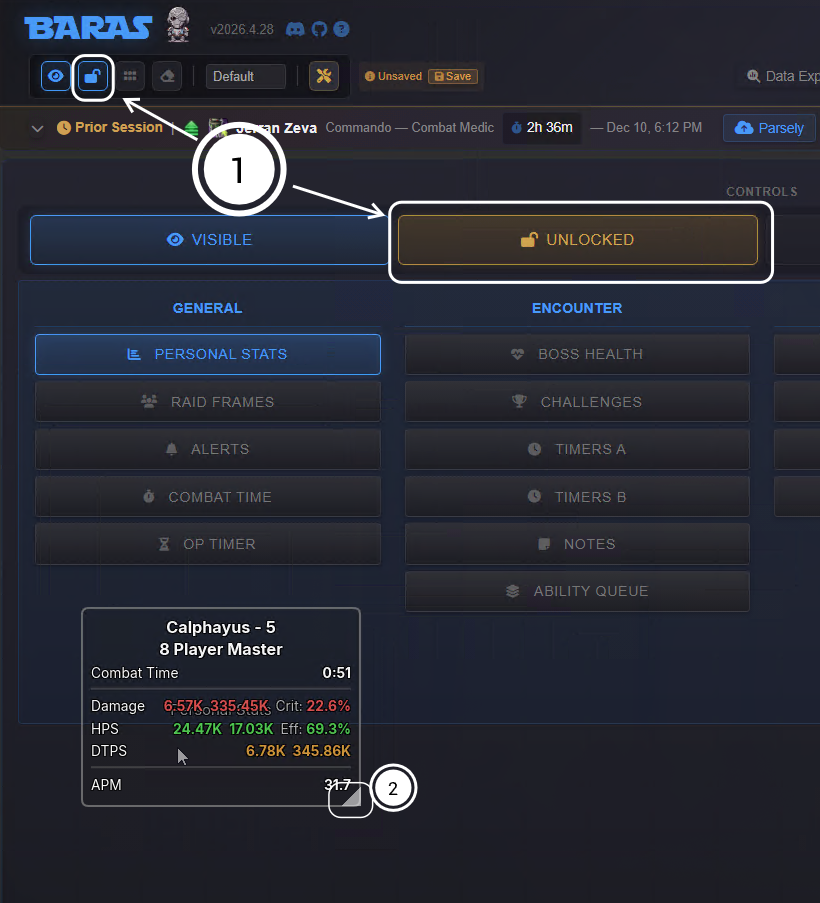
To ajust overlay settings:
- Toggle Movement Mode by clicking the lock button.
- In movement-mode, you can click and drag a window to the desired screen posistion. Overlays will automatically snap to the nearest 10 pixel-increment. Resize overlays by dragging the bottom right corner.
Next Steps
Section titled “Next Steps”You’re all set to start parsing! BARAS should work well out-of-the-box with sensible defaults. But there are many advanced feature and configuration options to explore in order get the full value out of the app. Here are some things you can check out next:
Customize your overlay setup
Learn how to manage overlay profiles
Setup Raid Frames for HOTS tracking
Learn about the effects tracking system
Explore how the encounter builder enables custom timers and definitions
Configure global hotkey shortcuts and other application settings